Links in our articles are for companies who’s products we use and love. When you make purchases clicking these links, we might be compensated for sending you to their website (affiliate links) or we might not! We are not compensated for reviewing products, and the opinions on this site are purely the writer’s. We appreciate your support and trust as we know your time and money is valuable!
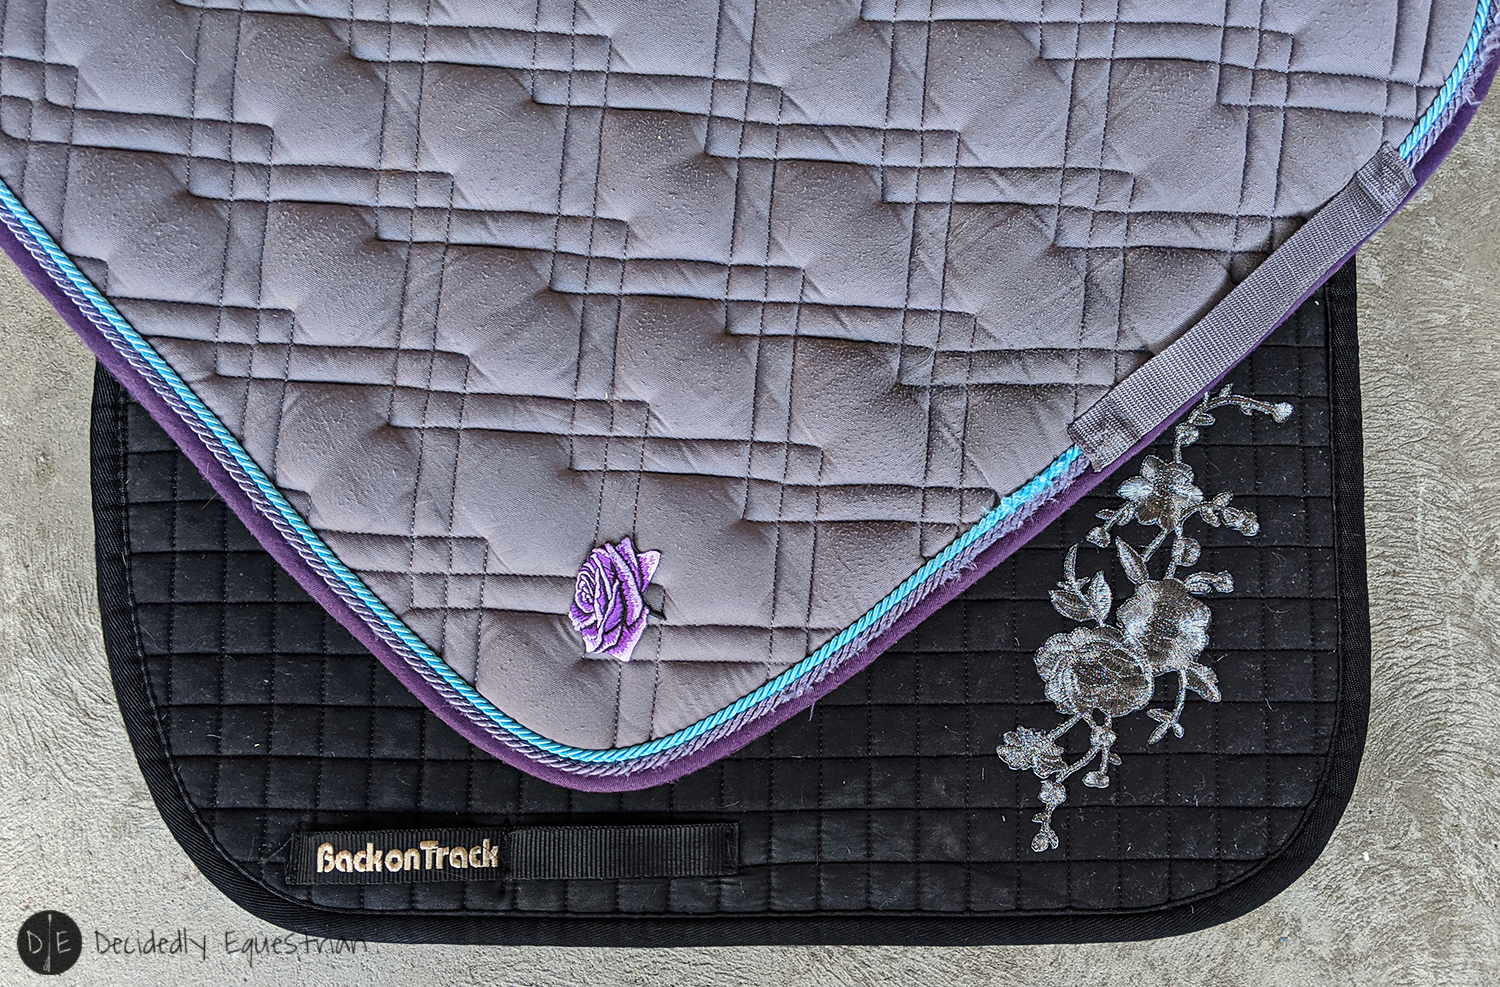
Since we’re all “sheltering in place” in our houses (or you will be soon most likely), what better thing to post than a quick and easy DIY project to take up some of that time (and you don’t need any fancy equipment like a sewing machine)! Everyone at your barn has those same Back on Track pads right? And those same ones from Dover. Yup. At my barn they’re everywhere. I think three people in my tack room have the same color combo grey/purple/teal Dover dressage pad…and almost everyone has at least one Back on Track pad. Well…if you’ve seen my Instagram…you’ll know I love pretty pads…and I love florals (I of course…just bought some more too to help “stimulate this economy.” too).
To me this simple DIY project handles a couple of needs:
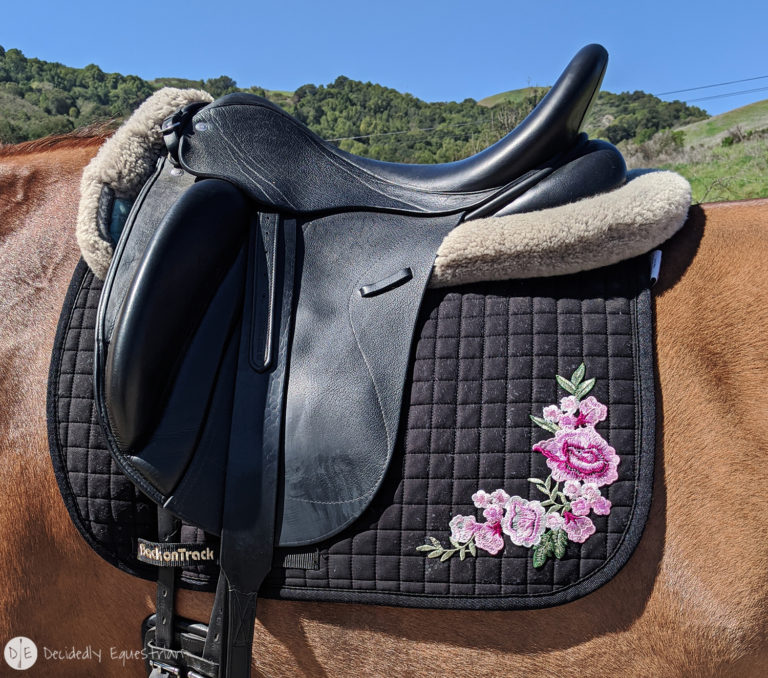
- It makes my pads pretty! Completely necessary right? A day riding in a pad without flowers on it is a sad sad day indeed.
- It helps me be able to tell which pad is mine. If there’s a “pad-valanch”…as there is some times if you happen to clutz into the saddle racks just right, it is not always so easy to tell which pad is yours. Or maybe you keep seeing white hairs on your bay horse’s pad…or maybe it just goes missing altogether! Well this little DIY project will help with that problem! Easy pad identification!
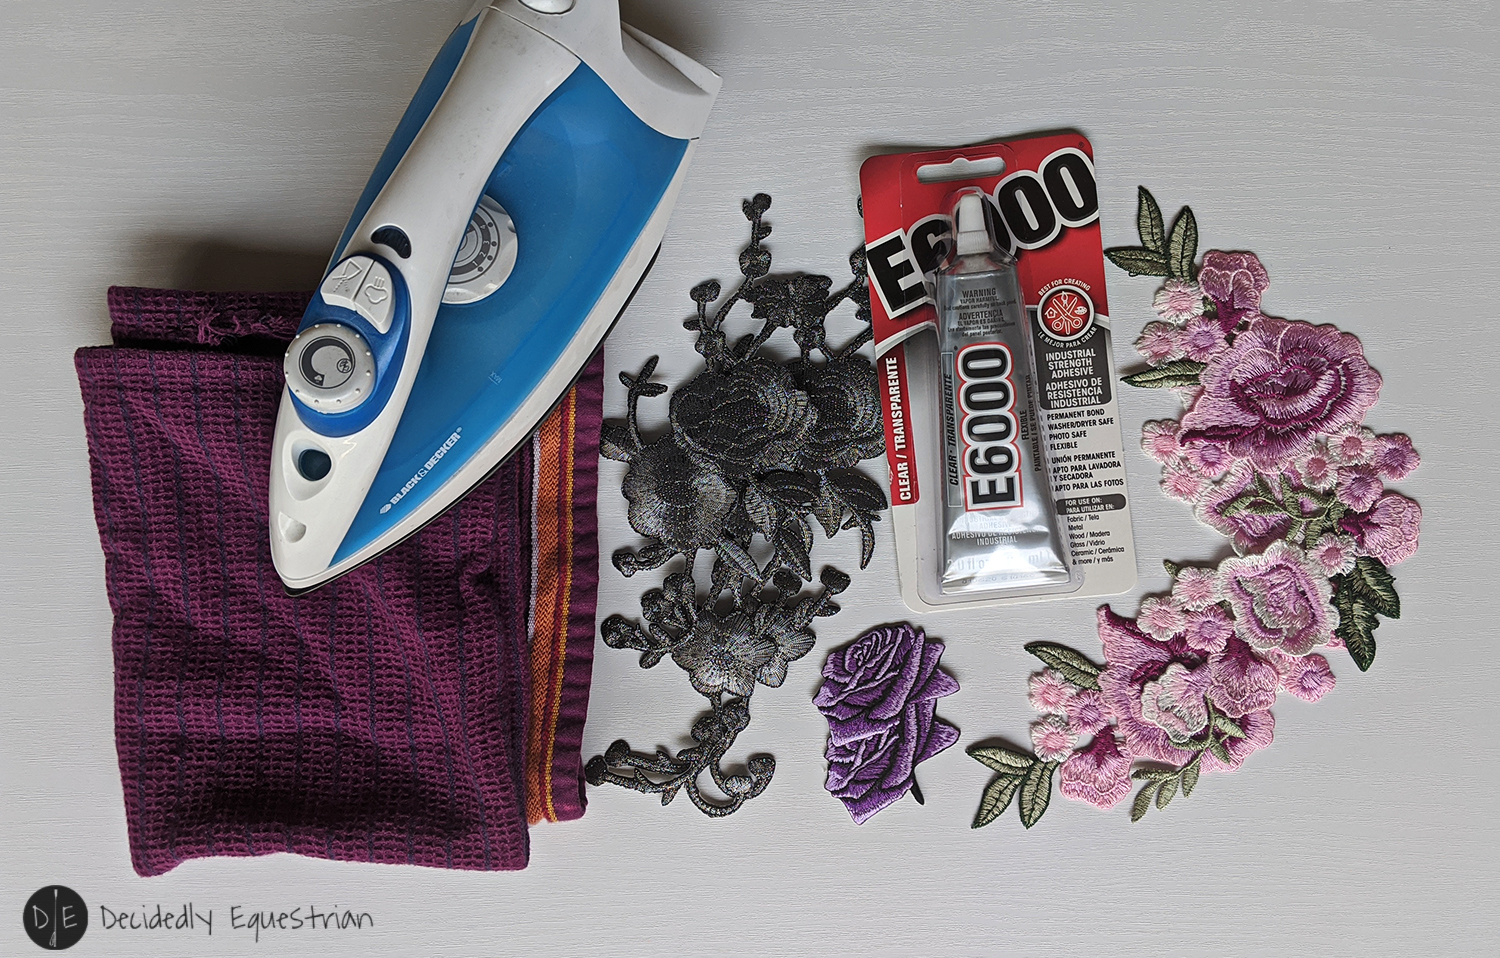
What you Need
- Ugly/Boring pads! Freshly washed so that not or sweat interferes with the glue. Some fabrics will not be suitable for this… so choose wisely. Plain cotton fabrics work best (and yes the Back on Track ones work fine).
- Iron On Patches or Other Fashion Applique of your choice (doesn’t have to be flowers, can be initial patches, birds, rock bands, Harry Potter, Baby Yoda…whatever!). Etsy is a great place to find patches. So is Amazon (that’s where I got all of mine). No limits! Have fun!
- An Iron
- A pressing cloth/towel
- Some really good Fabric Glue. I used E6000 glue which works on fabric as well as lots of other things.
Note: If you want the same patches that I used, the pink flowers you can buy here and the purple flower you can buy here. The gray ones I picked up in person at a local shop some time ago, so I unfortunately don’t have a link to share.
How To Iron On
- Turn on your Iron to the hottest setting. DO NOT have water in it and no steam setting.
- Gather your freshly laundered saddle pad and place your patch where you want it on the pad. Make pencil marks if you’re worried about remembering exact placement.
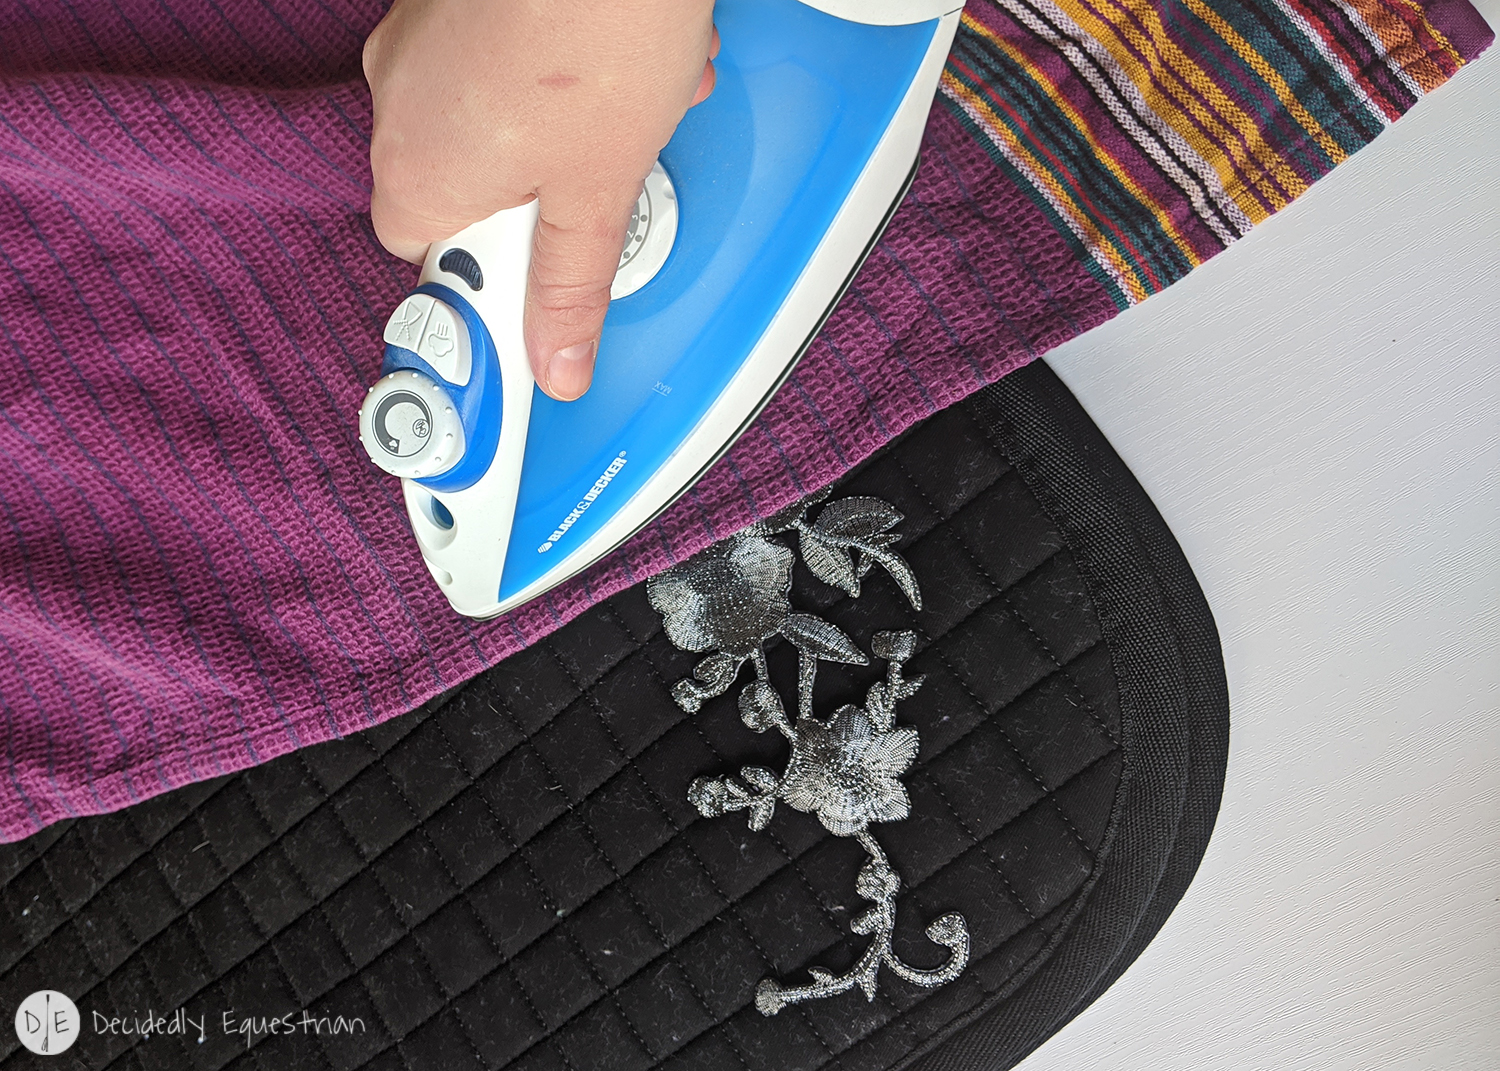
- Once Iron is hot, use iron over saddle pad in area where patch is to go down to heat up fabric to help with glue transfer.
- Replace patch where you want it.
- Gently lay Pressing Cloth over the patch to protect it.
- Use Iron in strong pushing down motion on the Pressing Cloth directly over the patch. Hold for 15 seconds.
- Move Iron if needed to get other areas of patch if patch is bigger than iron.
- Remove Pressing Cloth and check adhesion of patch to pad around the edges. If not attached well, replace cloth and iron again for 10 seconds.
- Repeat process until patch is stuck down well. – If patch isn’t sticking well, your patch may not have had even glue, so you may need to touch up edges with fabric glue.
How to Glue On
- Gather your freshly laundered saddle pad and place your patch where you want it on the pad. Make pencil marks if you’re worried about remembering exact placement.
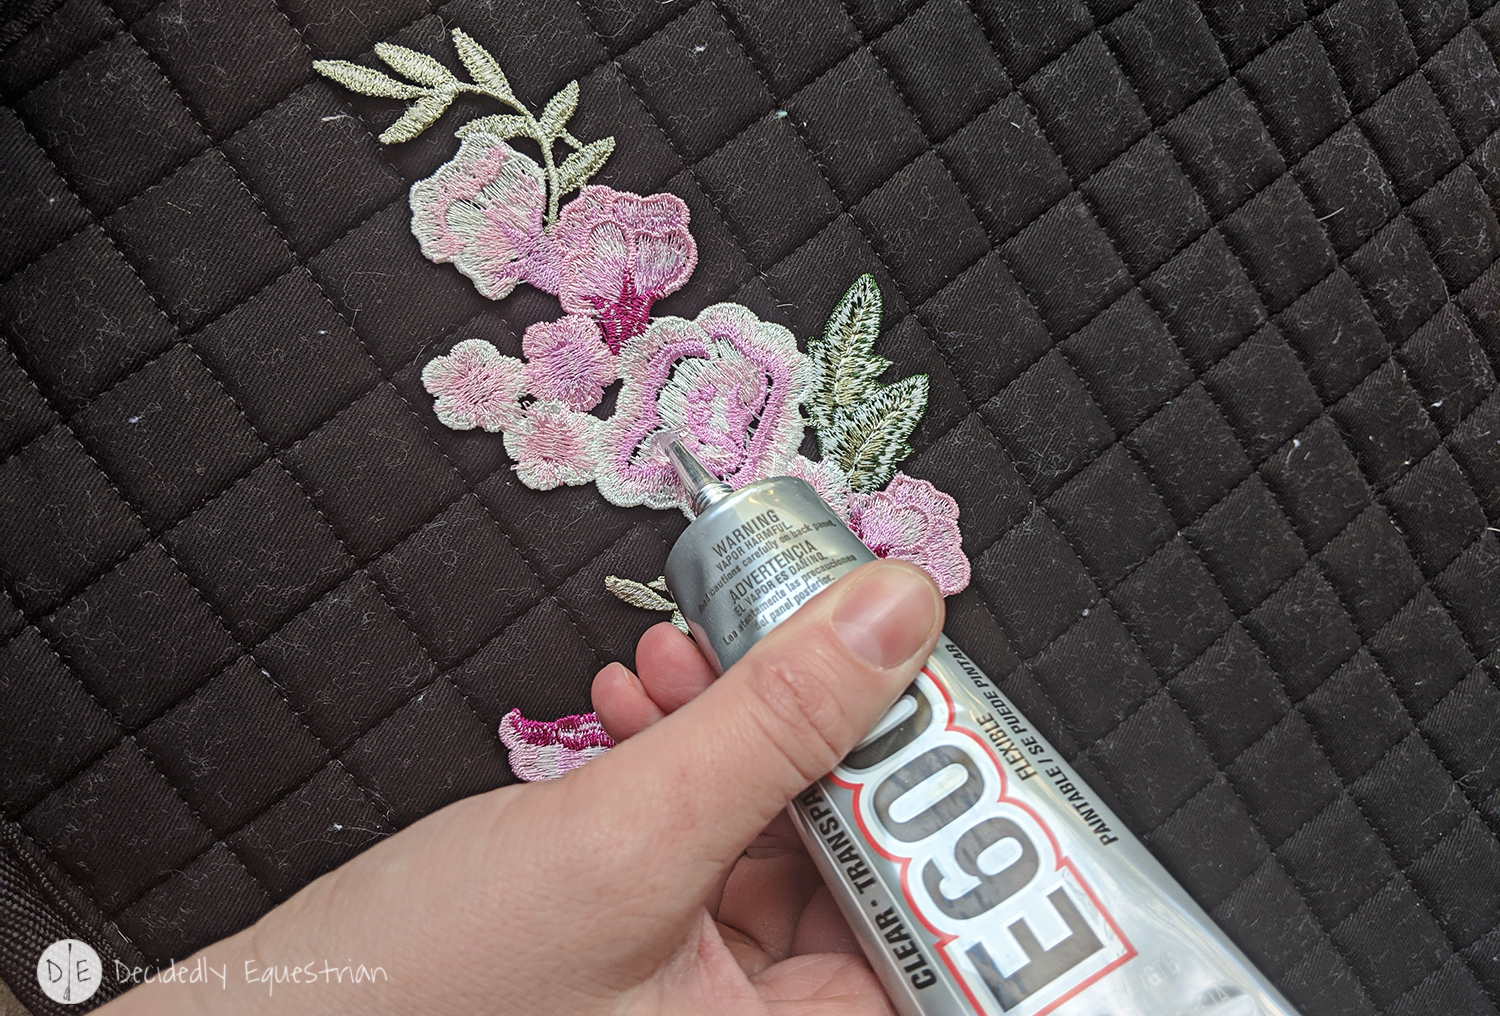
- Open up your glue
- Very carefully apply glue to the back of the applique. Don’t OVER apply or you’re have a goey mess. Don’t under apply or it won’t stick. Make sure you cover EVERY single part of the patch with glue or it will not evenly apply and will come off quicker. Tip: If you’re hand isn’t steady or you’re using a very liquidy glue, you can use a foam brush or bristle brush to apply the glue evenly. Be warned, you’ll have to toss the brush in the garbage most likely when you’re finished.
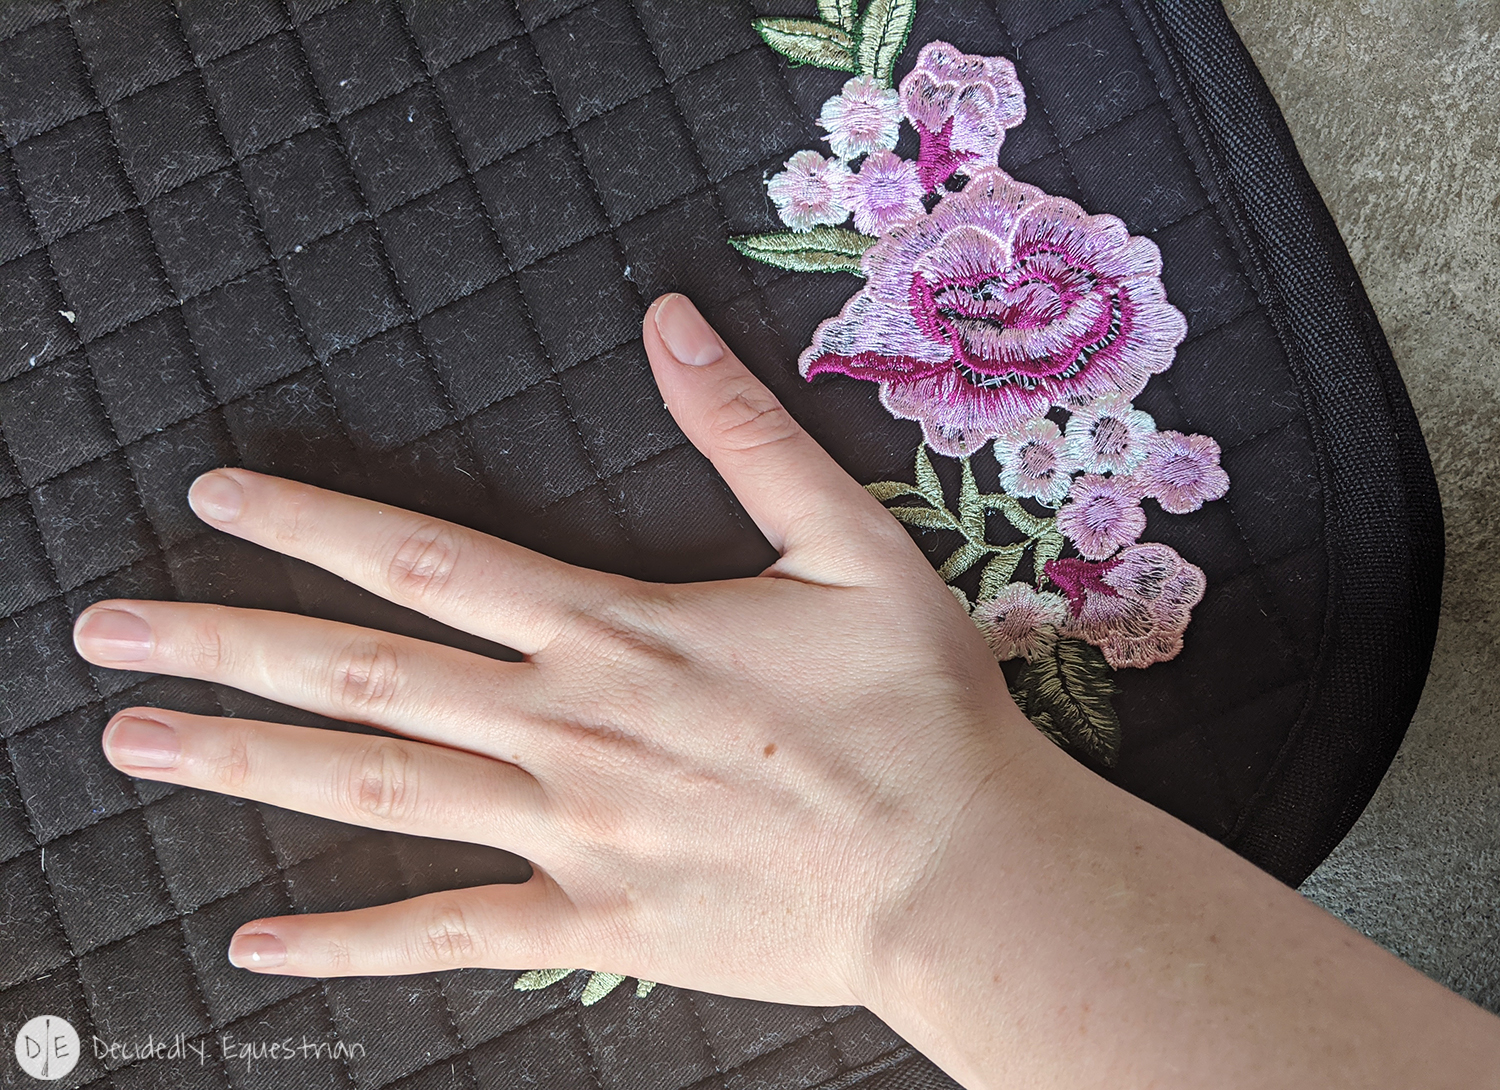
- CAREFULLY flip over the applique to place it where you want on the pad. If you miss, you’ll end up with glue smear on your pad you don’t want (I managed that on one side of my pad…and it doens’t look nearly as lovely as the other side).
- Press gently down on the applique until the entire thing is placed where you want it securely on the pad (and then go wash your hands).
- If you got any excess glue on the pad, you can quickly wipe it off with a damp rag or damp q-tip. Though some of it won’t come off…so that’s why over applying glue is a bad idea and you need to carefully place the patch down.
- Let patch set for a couple of hours and then check edges of patch to make sure there are no loose bits (be careful not to “test” too forcefully or you’ll pull the patch off…the glue takes up to 24 hours to set depending on glue). Re apply glue to loose bits and repress the patch down.
- Let pad sit unused for at least 24 hours to set.
Care
- Don’t wash every ride in the washer. If you do, the patch won’t last long. I know some people wash pads every time you use one…this DIY is probably not a good one for you. Try sewing the patch or applique on instead.
- Do NOT dry the pads in the dryer any longer. Hang to dry. Adding the heat of the dryer can and will cause the glue to fail much faster.