
Links in our articles are for companies who’s products we use and love. When you make purchases clicking these links, we might or might not be compensated for sending you to their website. We are not compensated for reviewing products, and the opinions on this site are purely the writer’s. We appreciate your support and trust as we know your time and money is valuable!
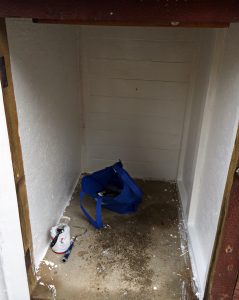
Champ and I were recently evicted from our old stall/tack room (Champ was actually evicted so I went with him. He moved to a box stall because he kept re-injuring himself pacing in his paddock. He does not pace or stall walk in his new box stall…amazingly enough). Champ wasn’t the only one downsizing…I went from a large shared space tack room (that had a security system, electricity, insulation, and lots of other cushy benefits) to a tiny tack cubby. The tack cubby was pretty small, dark, dirty/damp, had no power, was open to the outside and the stalls via gaps between the wood, open to the tack rooms next to it, and had a very flimsy lock. The future was looking pretty bleak.
I had to do a makeover project on this scary little box and try not to spend a fortune (I did spend more than I wanted…I admit). There was no choice. I could not happily use the tack box as it was. 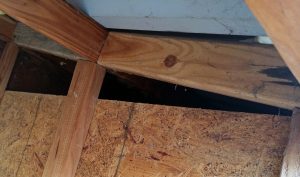

Step 1. Clean! Spiders, sawdust and mud oh my!
Step 2. Close it up. Board up the top of the tack room so that it is separated from its neighbors. Why bother cleaning up your tack room, when your neighbor hasn’t de-spidered theirs in 2 years? I have to thank one of my barn friends for helping me with this step of the project (Thank you Bob)!
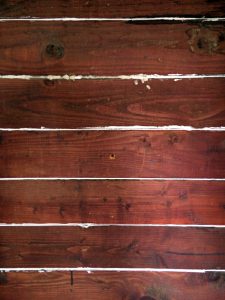
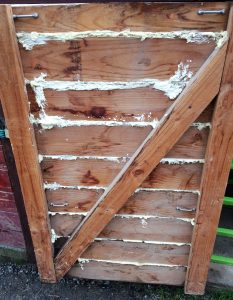
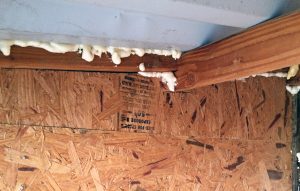
Step 3. Caulk, foam and seal. The next step was to caulk all gaps under a certain size and spray foam any large gaps to seal the tack room from every possible incursion by water, dirt or spiders. The last part of this step was to put weather striping around the door (which isn’t 100% sealed, but better than nothing). Our first foam attempt didn’t work (the foam didn’t harden…possibly because of the humidity level outside…). I had to buy a different kind of foam and redo this part of the project when the rain stopped.
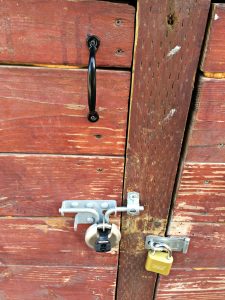
Step 4. Update the locking system. This was a project! Bob helped again, and it took us several attempts at buying the correct locking mechanism that would actually work for this door. While not 100% thief proof (what is?), it is much more secure now, opens and closes easier and looks much better!
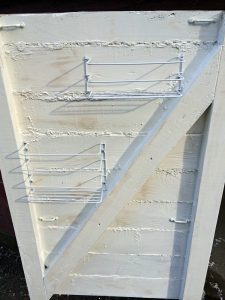
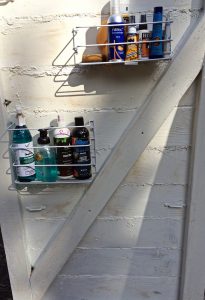
Step 5. Paint. This was an adventure with all the rain…It took double the amount of paint that I expected for this tiny box. It also took more than twice as long to dry. It looks so much better now though it was worth it (and I’ve had several requests from others asking me to paint their tack room…fat chance)!
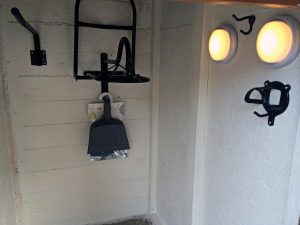
Step 6. Hang stuff. This was a bit of a challenge, as I had to move the saddle rack a couple of times to make sure it opened, that the saddle fit without being crammed into the wall, and that I could actually get the saddle on it. I still would like to buy a couple more hooks, but I ended up with the following:
- 1 saddle rack
- 1 blanket bar
- 4 baskets for supplies/boots (various sizes available)
- 2 bridle hangers
- 2+ hooks
- 1 door handle (a must!)
- Battery powered touch lights (another must)
- DampRid Hanging Moisture Absorbers (SUPER IMPORTANT to keep the humidity level down during rainy season to protect your tack. Great for tack trunks too).
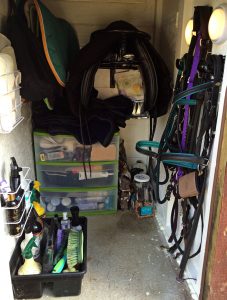
Step 7. Fill it up! The most exciting part. Time to move everything down, move stuff around and organize the cubby to make it look as spacious and tidy as possible. While small, I can get in the tack cubby (ducking) and shut the door and fit with all of my things.
The future is not as bleak as I thought! So far the move has been great. I’m right around the corner from Champ’s stall and the only thing that will make life easier is a folding saddle rack on his stall door. While most of this was unnecessary…I feel that the nicer your space is, the better you feel (both at home and at work). A few changes and $200 bucks (give or take) can really improve your outlook.