
Links in our articles are for companies who’s products we use and love. When you make purchases clicking these links, we might or might not be compensated for sending you to their website. We are not compensated for reviewing products, and the opinions on this site are purely the writer’s. We appreciate your support and trust as we know your time and money is valuable!
One of my favorite things to do is make gifts for my horse loving friends. I have several DIY projects that I return to time after time, but this is one of my favorites (but also the most time consuming). What you need is a place to do it, time, patience and a little skill (don’t worry, you don’t need a lot of skill to make something fairly cute). This project will take several days as you need to let layers of sealer, gesso and paint dry.
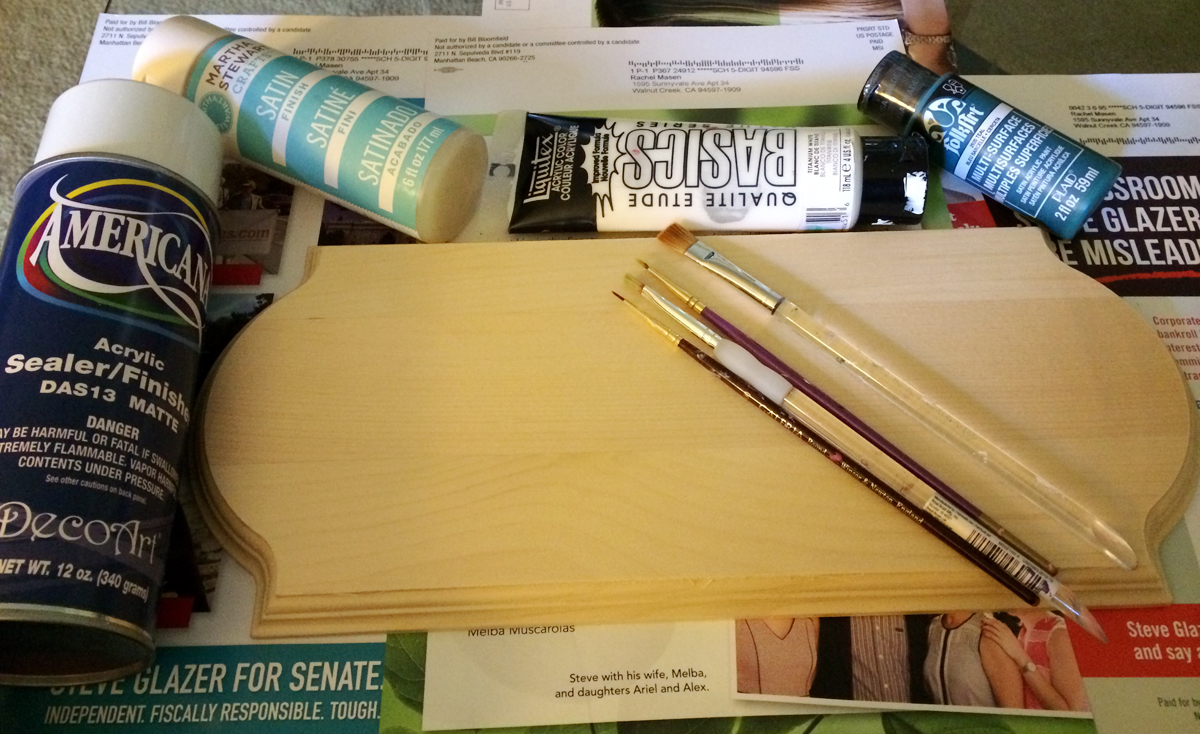
Step 1. Gather supplies.
1. Wood sign (Any shape works).
2. Various acrylic paints (whatever colors you want). Remember that the more colors you use, the busier the sign will look. You need to have pretty good artistic skills to make a stall sign with a ton of colors look good. 2-4 colors are best.
3. A spray primer (and an outside location for this part) and/or gesso (if you pick a clear primer, you need to gesso after if you don’t want the wood to show through).
4. Brushes of a variety of sizes and shapes (but sizes should all be on the small side).
5. Some receptacle to put paint (you can buy these…or use cleaned out tuna cans…or other recyclables).
6. A working surface (I always put down newspaper, mailed junk fliers, etc.).
7. A spray or brush on varnish/finish. Make sure you get one that is appropriate for outdoor.
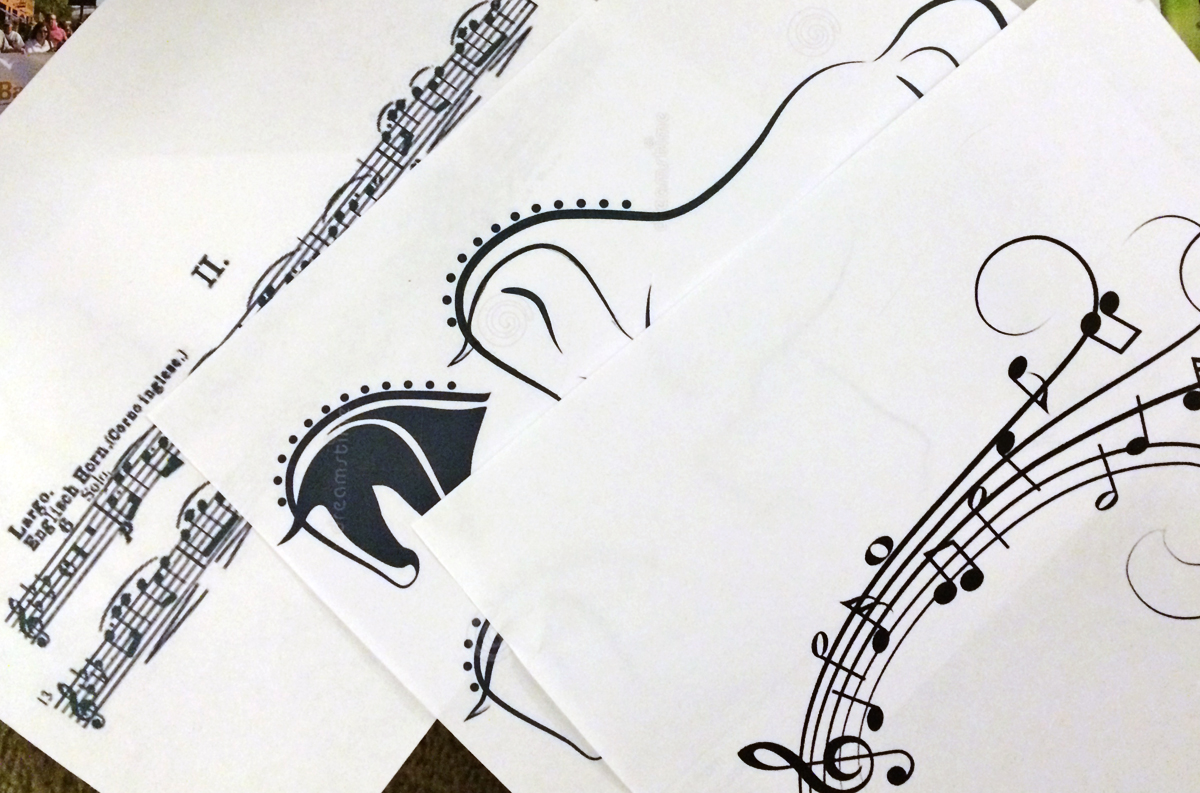
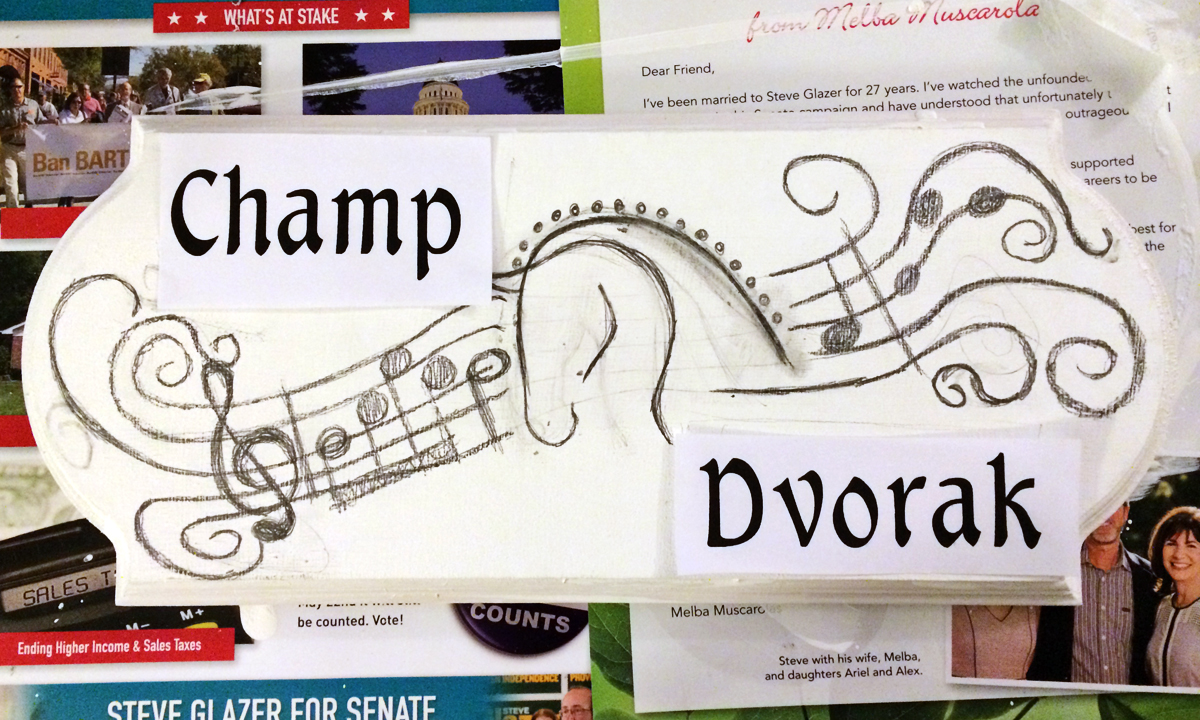
8. Images or designs for inspiration. I like to play off the horse’s name. My inspiration for this project came from Champ’s registered name of Dvorak (for the non-musical out there…Dvorak is the name of a famous Czech composer) and his new life as a dressage horse.
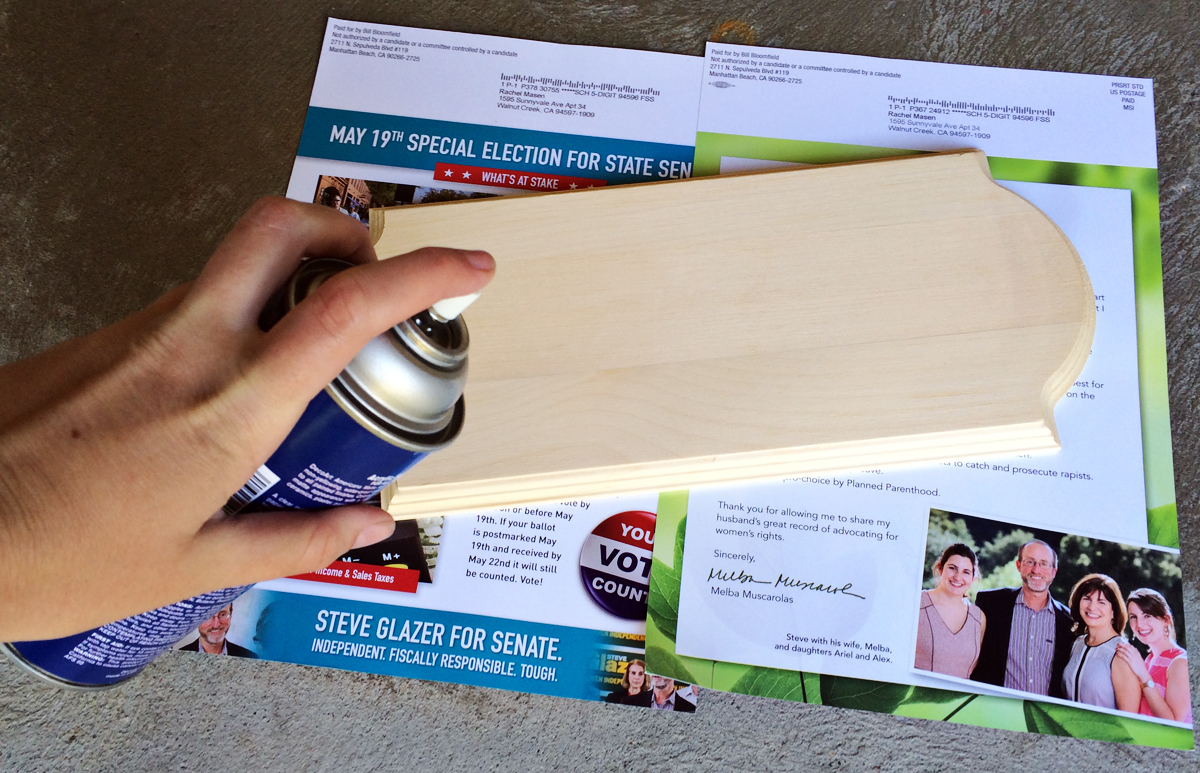
Step 2. Prep wood with spray sealer. Follow the directions on the container. Do this outside. Let this dry outside (unless you want to get a headache). Do at least two layers. Do front and back of the wood (at separate times) to ensure that the wood will hold up outdoors. You’ll need to let this dry for a minimum of 1 day before moving to step 3. If you use a white primer, you can skip step 3. If you used a clear one, go to step 3 now.
 Step 3. After the sign is dry from the spray sealer, you will want to paint the front surface with white paint (unless you want the wood grain to show through…and that’s another set of steps). This gives you a blank canvas to work from and provides another protective barrier for your paint. Apply two or three coats until wood no longer shows through (let dry between layers). If you don’t do the spray sealer and you don’t do this step, you risk the paint peeling off. Let dry for a minimum of 1 day before moving on to step 4.
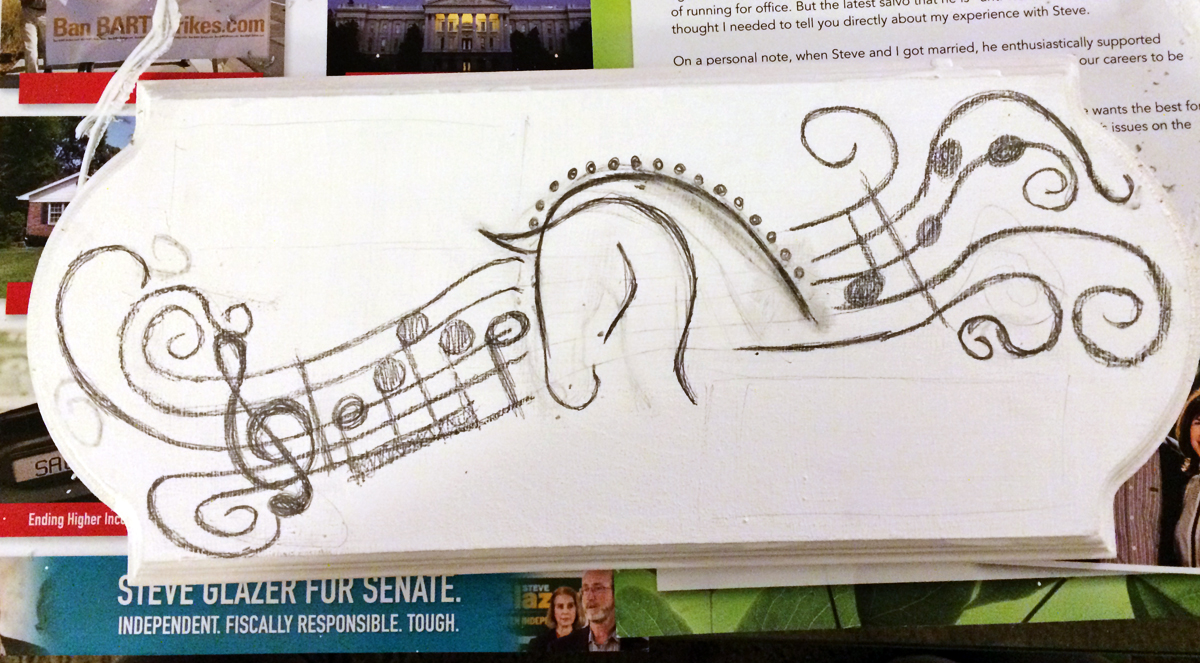
Step 4. Sketch out your design in pencil. If you cannot free hand draw this, if you print your design out, you can use transfer paper to transfer you image to wood. Please see Step 6 for more explanation.
 Step 5. Computer time (unless you’re amazingly skilled at free-handing fonts/lettering)! Go research the perfect font for your design. There are hundreds of free fonts online on various websites that cover a number of styles and themes. There is a font out there that will match your design perfectly. Measure the width and height of your area for text and write that down. I like to do this in InDesign…but I realize most people don’t have that. You can do it in other programs as well, you’ll just need to do a little bit more guessing. In your computer program, type out the text you want to include and select your new font. Proceed to size up the font until it’s big enough to fit into your dimensions for your sign (but don’t make it too big). Print, cut out the font (just trim into a nice rectangle, don’t cut out the individual letters. You may need to print this a few times changing the font size for this to turn out perfect. Lay the trimmed pieces on your stall sign to check the overall design.
Step 6. I found an easier way to do this! Instead of carving your design into the wood, I found an easier method – Graphite Transfer paper! Simply lay the transfer paper over your wood, lay your drawing on top and trace over it with a firm pencil stroke to transfer the drawing to your wooden board! Easy!
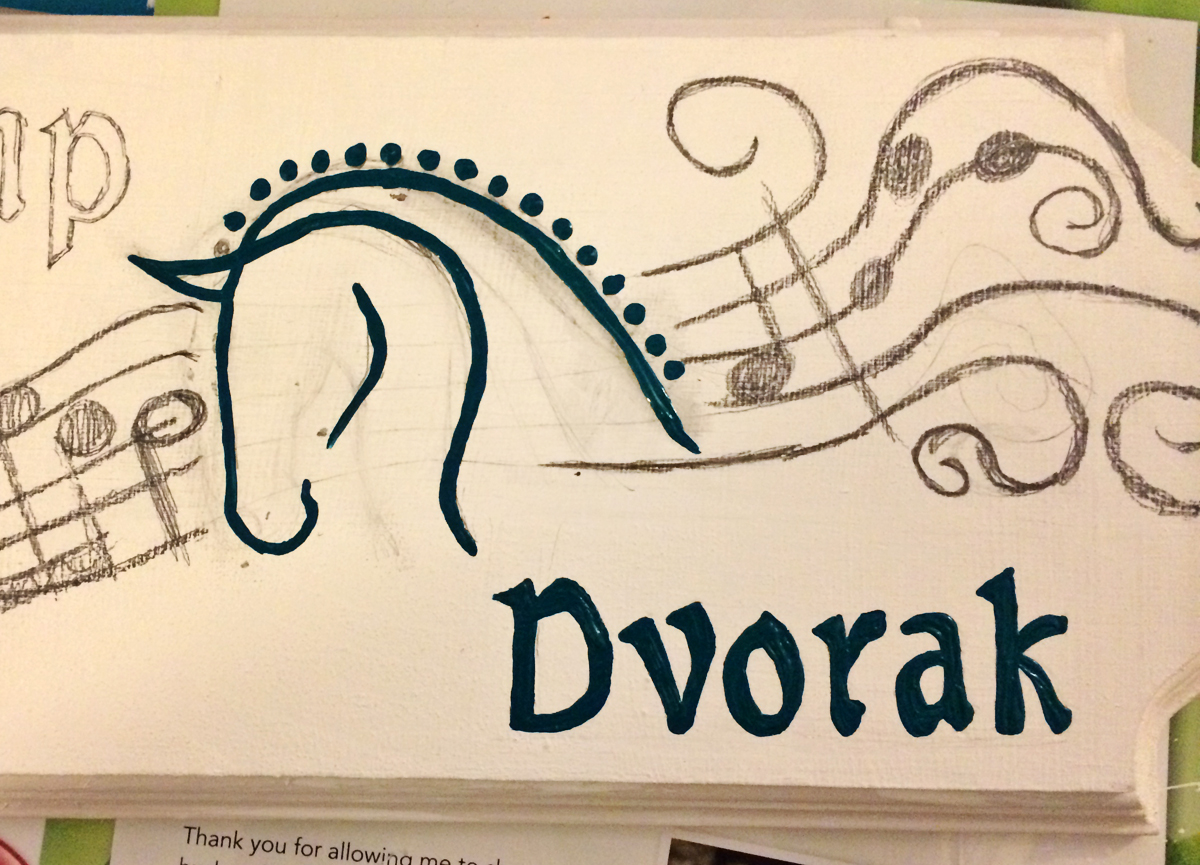 Step 8. Finally ready for paint! This will be a multi-day process of many layers and building up the paint to a texture and finish that you like. I usually do 3 or 4 layers of paint as I like the sign to have a little texture. I start with the design and paint that and the text first. Then we paint in the background, making sure to be fairly careful around the edges of the already painted section. I usually do two or three layers of background painting in a row (including painting the edges of the sign). After the background is painted, I go back to the design and paint over what I did before at least two layers or until perfect. At the end you’ll probably have to fix a few spots where a stray hand jerk sent your paint where you don’t want it. Just fix it by covering with more paint (but try and keep layers thin). Let dry for at least a few hours between layers. Let dry a full day after last coat before moving on to step 9.
Step 9. Finish it off. Now it’s time to seal and protect the painting that you’ve done. Do at least 3 layers of sealant on the front. Let dry the required amount of time between coats (will say on the bottle). This stuff is thin and it is easy to apply too much or pour too much out of the bottle. Be careful. After letting the front fully dry (don’t forget to get the sides!), flip it over and seal the back a couple of times for good measure to help prevent wood rot.
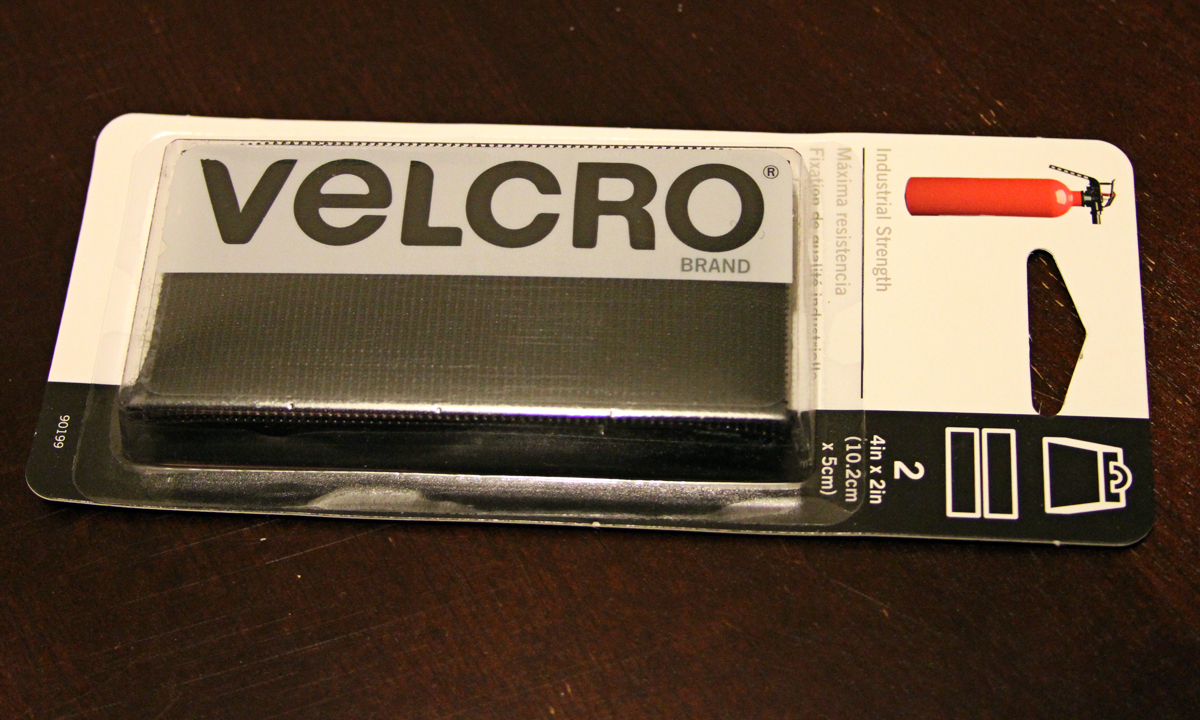 Step 10. You’re done! Now it’s time to hang it up. Make sure to hang this out of mouth’s reach of your horse (they will find it and chew on it). I like to use industrial strength velcro to hang these up because I move horses around to different stalls so often I need to be able to move their signs as well. You can also apply a chain with little hook eye screws, screw this to a door, or various other methods.